I’m making shoes again.
I bought a pattern and did a test-build. The upside, I learned a lot. I’m totally unsurprised the result doesn’t fit. My feet are pretty abnormal.
 It’s important to know what type of foot you have. I have very short feet with very high volume and my foot has a significant curve from heel center to toe center. My foot from heel to end of middle toe is 8.25″ long. My foot is also very wide. 3FF. Until I had custom boots made at White’s I didn’t know there was such a size. Wadly, venerable spouse, says I wear boxes with laces. Wadly has feet that are the complete opposite. His are very long, very narrow and extremely low volume. He’s living the other end of the “shoes don’t fit” spectrum, he has skis for feet.
 The shoe pattern I bought is designed for a more common lower volume straighter foot, something approaching the average foot shape.
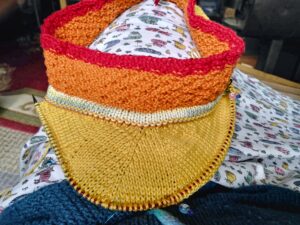
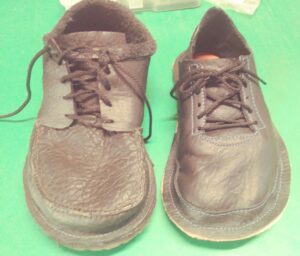
These are from two different pairs of shoes, one I designed that fits and the pattern result. The shoe on the left is what fits me. It is loose enough to accommodate a heavy sock. The shoe on the right is from the pattern. I haven’t added a sole yet because the shoe so low volume I can’t wear it with a sock. I have to take it apart and rework it into something with enough volume to accommodate a sock. (See epiphany at end)
 Feet come in four toe shapes; sloped, mountain, plateau and square. This shoe pattern is designed for someone with sloped toes with the big toe being the longest. I have mountain shaped toes with the middle toe being the longest. I had to take some off the big toe and redistribute that volume to the middle toe before ever trying the test shoe. There isn’t quite enough height to comfortably accommodate my fat little piggy toes, something another pattern user commented on.
The second issue is the shape of my foot versus the shape of the footbed. My feet aren’t straight. They curve from heel to toe. If my feet were straight I’d probably wear a women’s 6C or D. The left is a tracing of my foot with room for my toes. This is the shape and size of the foot bed that works for me. The right is my foot bed laid over the pattern sole. Parts of my foot go right over the flange and, at one point, out of the pattern. There’s no way the pattern’s footbed’s shape will ever accommodate my foot.
The poor fit is NOT the fault of the pattern. For most people this would be a lovely pattern with a nice unique heel construction. I know my feet are weird and expected no less than a bad fit when someone else drafts the pattern for the average foot.
The pattern video is here and partners the pattern. It’s worth a watch if you’re at all interested in making your own barefoot shoes. The video sound isn’t the best so be prepared to turn it up.
In writing this I had an epiphany. I spend 99% of my time barefoot. I have fake crocs I use for running to the outside fridge or out to meet delivery drivers when they show up when the weather is wet or cold. I can take these “do not fit”s, fold the heel down and turn them into a replacement without too much effort. If I rip the midsole off and replace it with the shape that fits me I will end up with new slipons that will work for that job handily. A new midsole, a bit of sewing and soling, new elastic laces and I’ll be all set. Win win!

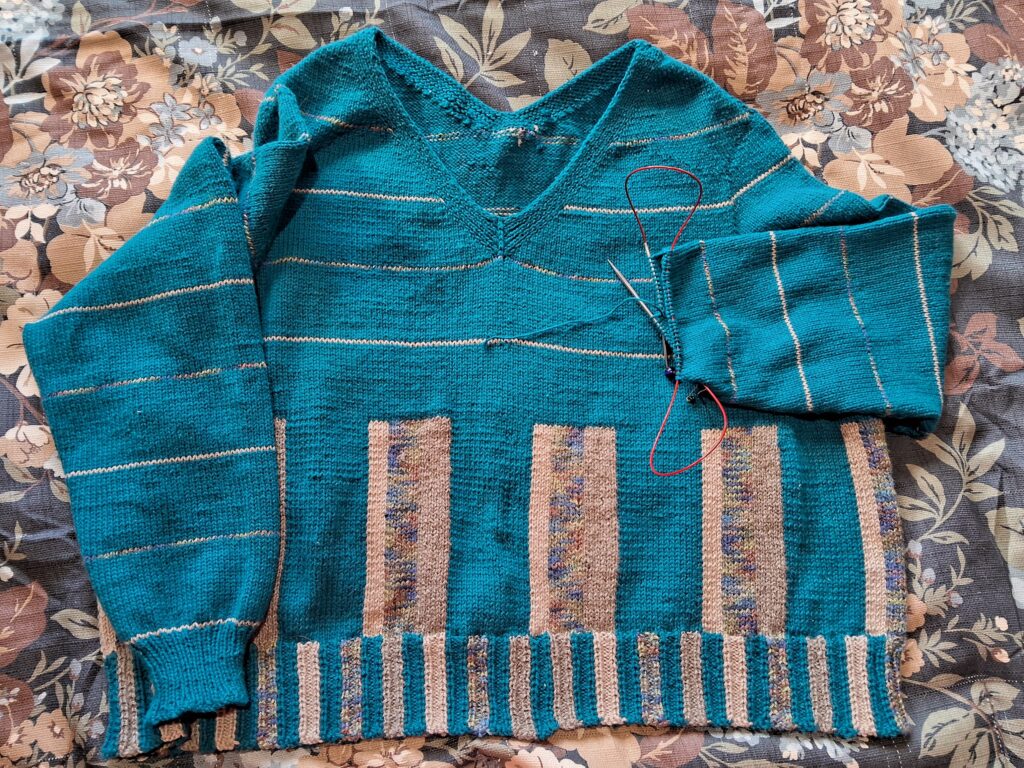
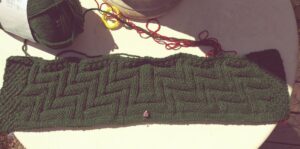
 I’ve started a new project, a sweater with vertical stripes. I’ve been pondering this project for a while and just happened to hit a sweet spot in yarn for the project.
 Then I started knitting with Hobbii’s Rainbow Bamboo (a lovely cotton/bamboo yarn). I bought sweater quantities of colors I really like, a graphite, a navy and a dark teal that perfectly matched the teal in the variegated chained bamboo. Trust me, this was not a deliberate choice but . . . score! Then I had some left over Universal Yarn’s Bamboo Pop “Sand” from another project (a shortie fade to wear over my day dress in the morning when it’s chilly). Like I said, kismet. The stars had aligned.
 I’ve made one pair of socks and they’re comfortable but a bit loose with wrinkles over the top of my instep. So . . . adjustments.
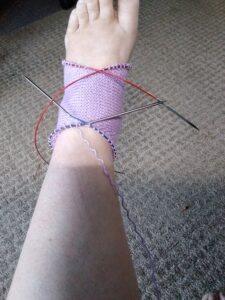 Because the finished sock had wrinkles across the instep I stopped doing increases for the instep wedge at the start of the short rows. This was marvelously successful. It produced a shorter (from ankle to toe) instep which resulted in a better fit.
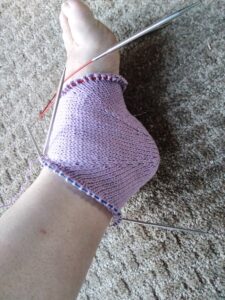 The result of fewer rows produced fewer short rows which produced fewer ankle and toe stitches and shorter instep run giving a better fit.
 I have a horrible time getting shoes and socks that fit. I have insanely short feet with unbelievably high arches. I am not kidding, my foot is shorter in length than the measure around my foot at the arch. 9.5″ around, 8.25″ long. Manufacturers do not make shoes that fit feet like mine. The new barefoot movement has promise but even there the shoes that purport to be made for high volume feet don’t have enough volume.
 I bought two patterns from Cita Steinmeier that hold great promise. They’re both knit the same way from the heel out but with different starts. The bit I don’t care for is the knitting of the heel section ends at an awkward angle where the leg and toe are destined to be knit. In addition, the edges traveled too far up the back of my leg and down the bottom of my foot toward the toe. (I did say insanely short feet with unbelievably high arches. When I had boots made they were judged to be 3FF (US), so . . . yeah . . . totally abnormal.)
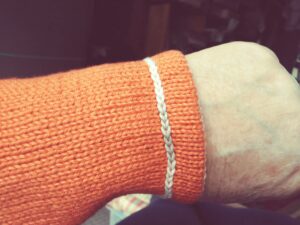
 So, the fix . . . I started by changing the caston. I did the classic thumb caston (3 stitches) followed by this setup worked in the round.
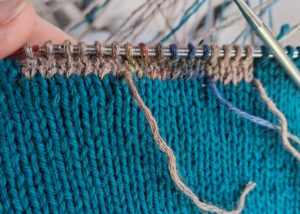
 The original pattern calls for two increases per section every fourth row. I like one increase per section every other row. It’s the same number of increases, just distributed differently. After setup the rows alternate between a row knit without increases a row knit with increases. The increase rows alternate between one increase at the beginning of each of the two sections on each DPN or the end of each of the two sections on each DPN. In other words, one round has an increase at the start of each section, the next increase round has it at the end of each section. I know that seems confusing. Once it’s a work in progress it’s dead simple. Knit one round. Knit the next round with an increase at the start of each section. Knit one round. Knit the next round with an increase at the end of each section. Repeat.
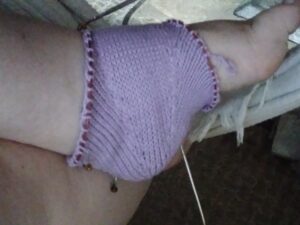 When the work was about one inch from closing over the top of my arch I started doing short rows to level the work. The SRTs are separated by three stitches. Work the short row turn on the fourth stitch from the previous turn, stop working SRTs when the section marker is reached. Don’t work any short row turns on the arch portions.
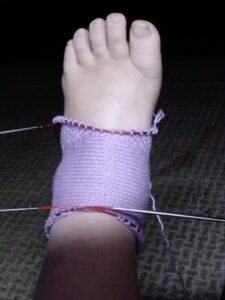 I think this will work for me. Thank you Cita Steinmeier for the pattern to start me off. (The fat ankle is the result of a horse/carriage accident. Totally my fault. The fat ankle thingy is permanent.)
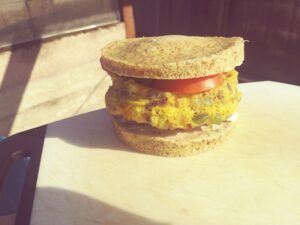 This is my current favorite thing to eat for breakfast. It’s SO good!
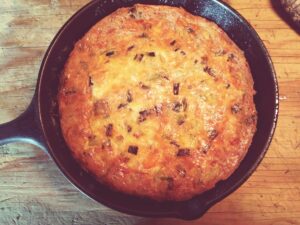 I had a frittata for breakfast. SO good! Plus I have half left over for another meal!
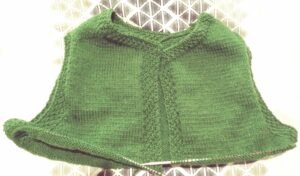
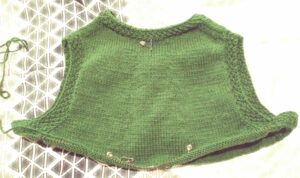
 Wadly had been carrying Mickey’s vest around in the van for weeks and hadn’t yet been able to get it delivered. He ran into Peter (Mickey’s spouse) at our local grocery and managed the handoff just in time for onset of crappy (wet and chilly) weather. Mickey’s happy.