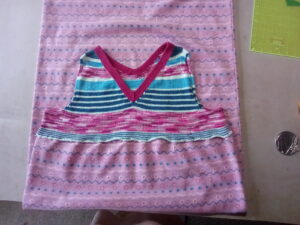
My current “this makes me happy” project is a long sleeved shortie sweater I can wear over my day-wear in the morning when it’s too cool to go without sleeves. I like shorties for a couple of reasons . . .
- They knit up quickly
- They’re a wonderful canvas for whatever idea is currently tickling my mind
- They’re perfect stash busters
- They’re perfect for using up bits of yarn, mismatched yarn, yarn from different manufacturers
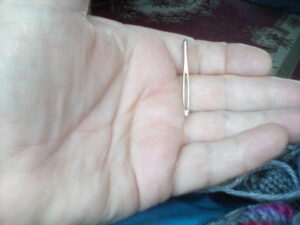
This latest shortie is currently on hold. I ran out of yarn 5″ from completion of the last sleeve. Yup, total fail at yarn chicken. I’m taking the gamble and have ordered another ball of the necessary color despite something close to a zero chance for a dye lot match. If it’s close and will blend in using Helix I’ll frog back 3″ of the WIP sleeve and helix the rest. If the dye lot is too far off I’ll replicate the existing body hem in miniature making the sweater just that bit more couture.
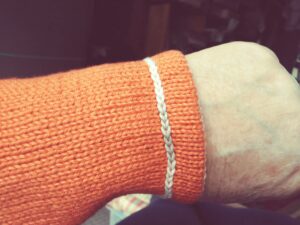
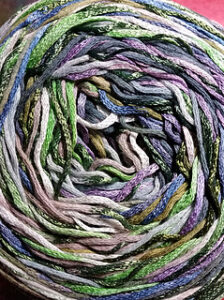
A quick note about the accent yarn. I got this linen blend yarn off ebay about a decade ago. I love the colors but had a problem figuring out what to do with it. It wasn’t really sport and it wasn’t quite DK. However much I love Bamboo Pop, when it took a $3 jump in price I totally balked at restocking it. I switched to Hobbii’s Rainbow Bamboo (on sale), a comparable weight and composition for fewer dollars and much more reasonable (and faster) shipping. One of the colors that enchanted me was Deep Teal. It just so happens it’s a perfect match for the teal in the variegated linen blend. Score!
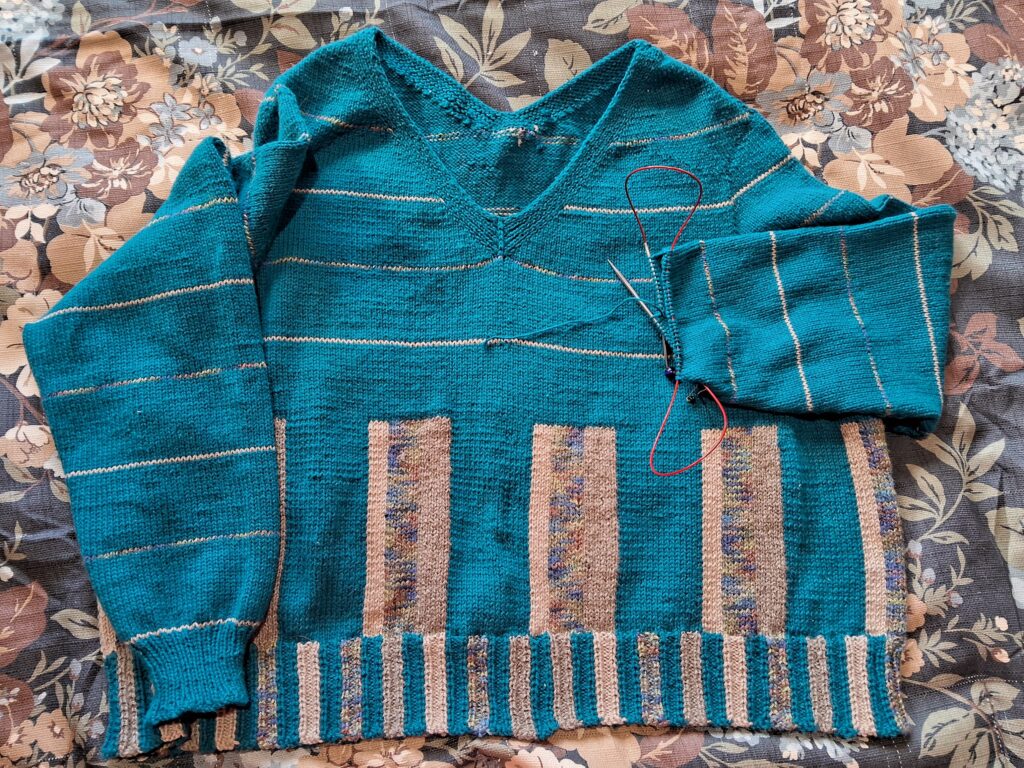
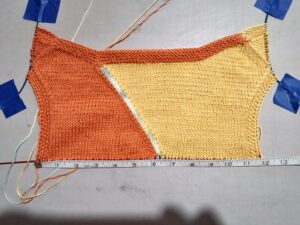
 I’ve started a new project, a sweater with vertical stripes. I’ve been pondering this project for a while and just happened to hit a sweet spot in yarn for the project.
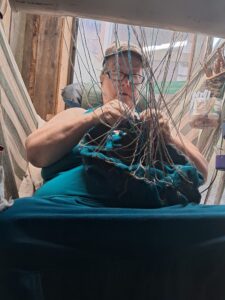 Then I started knitting with Hobbii’s Rainbow Bamboo (a lovely cotton/bamboo yarn). I bought sweater quantities of colors I really like, a graphite, a navy and a dark teal that perfectly matched the teal in the variegated chained bamboo. Trust me, this was not a deliberate choice but . . . score! Then I had some left over Universal Yarn’s Bamboo Pop “Sand” from another project (a shortie fade to wear over my day dress in the morning when it’s chilly). Like I said, kismet. The stars had aligned.
 I’ve made one pair of socks and they’re comfortable but a bit loose with wrinkles over the top of my instep. So . . . adjustments.
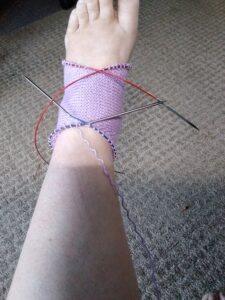 Because the finished sock had wrinkles across the instep I stopped doing increases for the instep wedge at the start of the short rows. This was marvelously successful. It produced a shorter (from ankle to toe) instep which resulted in a better fit.
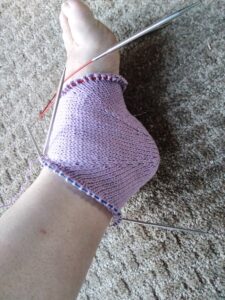 The result of fewer rows produced fewer short rows which produced fewer ankle and toe stitches and shorter instep run giving a better fit.
 Wadly had been carrying Mickey’s vest around in the van for weeks and hadn’t yet been able to get it delivered. He ran into Peter (Mickey’s spouse) at our local grocery and managed the handoff just in time for onset of crappy (wet and chilly) weather. Mickey’s happy.


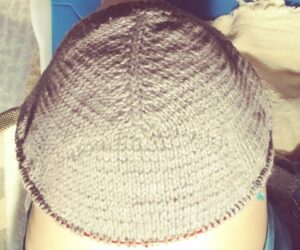 I’ve started playing with a new shoulder, something easy for people to knit that gives a really nice fit. I think I’ve got a winner.
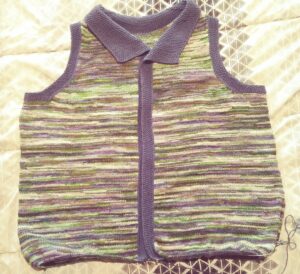 I’ve been slogging away on my Louisa Harding Mondovino duster. I’m halfway through my second ball (612 yards each) and I’m really pleased. This is conti-something, no picked up stitches. I’m working four increases, one under each arm and two running down the back. The increases are getting farther and farther apart as the rows are knit with one row being added between each increase row. I am currently at 15 rows between increases.
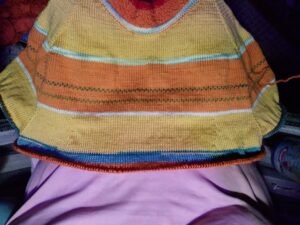


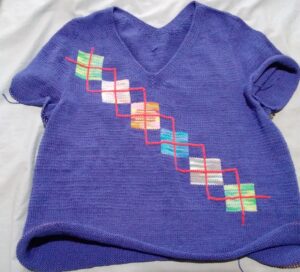
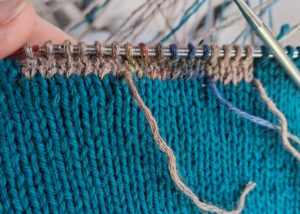
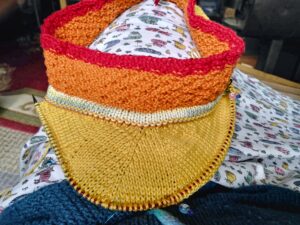
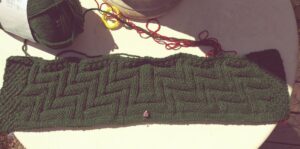
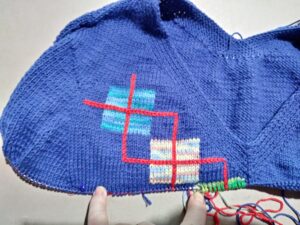
 This is coming along nicely. The pattern produced some interesting challenges. Intarsia in the round is not a challenge but getting the width of the horizontal red to match the width of the vertical red was. I tried Latvian braid but it was excessively fussy for the desired result. The answer proved to be a sizer larger crochet hook and surface crochet worked in the desired location. The second challenge was getting good corners where the red changed directions.
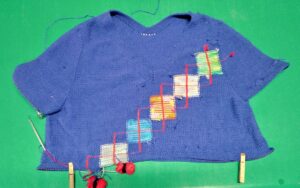 I’m having to cut the background color’s yarn at the start of each square. It’s not onerous and the result is very good. I’ve been working in ends as I go.
 Leftover sunset shrug yarn . . . but this time for me!
 I’m slowly using up the left over
  So as not to repeat my first fail, testing will be required.
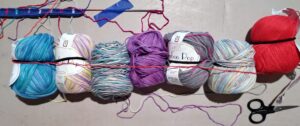


 So I’m off working on the sweater. The first attempt at Plaid! is a fail. So, the question is . . . switch the stripes to black? And the question is . . . don’t include any variegateds with a color similar to the base of the sweater? And the question is . . . start the first square above the fading saddle line?

 The duster I’m envisioning is a complete “knit from the hip” effort on US7 needles. I’m making the collar and decorative facings/hems in Bamboo Pop Denim, a yarn I normally knit on US4. Denim is a colorway that almost exactly matches the blue in the Louisa Harding. The Bamboo Pop yarn knits up into is a bit heavier/thicker but a test knit resulted in a relatively compatible gauge with the Girandola on the selected needle size. The resulting fabric is very relaxed and flowy, perfect for a long duster.