Seafood bisque

I’ve been trying to come up with a seafood bisque I could eat.  All the recipes I come across are not what I want; a gluten free, thick yet creamy bisque with excellent flavor.  I think I’ve managed it.  I’m going to make it again today to see if I’m truly on the right track.

4 tbsp butter

1 large carrot (diced)

1/4 each green and red pepper (diced)

1/4 large onion (diced)

1 large potato (peeled and grated)

Low sodium Old Bay Seasoning to taste

1 tilapia fillet (complete slice down length, cut cross-wise in ¾” wide pieces)

1 dozen petite scallops

1 dozen 51/60 count shrimp (peeled and de-veined)

1 cup milk

In a large sauce pan melt 2 tbsp butter (medium to low heat).   Add carrots, peppers and onion.   Cook and stir for as long as it takes to get the potato grated.

Add potato and remaining butter.  Stir, stir, stir.  When the mix begins to stick, add a small amount of water.  Stir some more, adding small amounts of water if sticking.  Turn the heat way down, cover tightly and simmer for 10 minutes.  Stir again.  If it’s sticking, turn the heat down just a bit and add a bit more water.  The goal is to get the potatoes just cooked without adding too much water.  Once the potatoes are cooked and before they start to fall apart, pour the mix in a blender and blend it.  Don’t over-blend, you want the carrots, potatoes, peppers and onions reduced to a textured pasty liquid.

Return to sauce pan on low.  Add low sodium Old Bay Seasoning to taste.  You will want to add somewhere between 2 tsp and 2 tbsp.  Stir and taste.  You will be adding milk at the end so the seasoning flavor needs to be just a bit strong.  You could add the seasoning at the end, but the amount of stirring required to mix it in would disrupt the fish and scallops, breaking the pieces apart.

Add the seafood.  This is the last time you will be able to stir without damaging the seafood so mix it well.  Cover and let simmer about 5 minutes.

Turn the mix very gently with a spoon to ensure the seafood is fully cooked.  Add milk.  Cover and cook 2 more minutes to bring the milk up to heat.  DO NOT boil once you’ve added the milk.

Garnish with a spray of low sodium Old Bay Seasoning granules and a few drops of heavy cream.

Serves 4.

Plant wall in May

Aphids on the Aphid Trap - smell-good fly paper for aphids.
Orchid blossom stalk is growing apace.
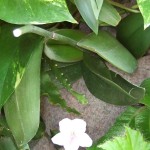
The Hawaiian begonia is starting to pop out of the wall.

It’s almost June, just another day or two to go.  The weather outside sucks.  It’s cold and rainy and only fit for foul weather fowl.  I’ve got stuff I need to do out there, but let’s face it, I’m a weather weeny.

The plant wall is doing well.  Terry added two more head-and-tail-light tetras yesterday and a fancy red tailed guppy today.  Having the wall keep the aquarium clean allows him to spend his energies admiring his fish instead of cleaning up after them.  He had a bit of a panic last night thinking he had a dead fish.  It turned out to be a leaf washed into the tank from the wall.

In the wall, the Aphid Chaser is chasing aphids and the Aphid Trap is enticing aphids.  The Aphid Chaser truly does chase the aphids off the wall.  From observation I’m going to say the aphids move down to get away from the Aphid Chaser.  At the bottom is my lettuce and tomato seedling and having the aphids end up there is not an ideal outcome.  To counter this I’ve added an aphid trap sheet to the outside edge of the trough and the aphids are traveling right past my seedlings to become stuck to the aphid trap.  This I consider an ideal solution.

I added a baby spider to the wall today.  Every little bit helps.

I’ve taken a couple other pictures to illustrate what’s happening in the wall.

The new blossom stalk on the orchid is continuing to grow.  This really pleases me.  I don’t know how long it takes to produce blossoms but I bet I’m going to get some.

Usually when plants are added to the wall there’s a period during which nothing happens.  The plants don’t grow, they don’t wilt but they don’t do anything else either.  Then all of a sudden the plant is producing flowers and/or new growth.

With the orchid this wasn’t the case.  It started growing and is working to produce blossoms.  It already had the right roots for this type of planting.  It’s happy, I’m happy . . . what more could we want?

The Hawaiian begonia has finally settled in and is beginning to produce the big leaves I remember from the parent plant.  The biggest leaf so far is on a 10″ long stalk and is about half the size it will be when the root structure fully adapts.  Mature leaves are about the size of a normal dinner plate on a ~12″ stalk.  Once the begonia’s roots develop enough to support it, I expect the plant to start producing blossom stalks (30″ long with tiny pink petals down the length of the stalk).

I love the textures, colors and shades in the plant wall.  The eclectic variety of plants produces something that warms my heart and soothes my soul.

Off to quilting

Laid out flat with all square dance blocks attached.

The bog coat is ready to go off to quilting.  Wadly’s going to pick up a Warm and Natural bat today.  I have a nice piece of soft yellow batik for the lining though I probably should use navy.

I basted a strip of material in the center front to hold the edges together for quilting.

Lettuce Seedlings

Lettuce seedlings in the wall gutter

I took the largest of the tomato seedlings from the wall gutter and planted them in the growbed outside.  Then it hailed and we had a spate of cold wet windy weather.  The wet part isn’t an issue, but the cold and hail and wind . . . toast.  <sigh>  I lost half the seedlings I planted out and the last two look like they’re on their last leg.  If we get a spate of warm weather they might pull through.  If they don’t I’ll put the 4 tomato plants still growing in the gutter in their place . . . when they get significantly bigger AND the weather improves.  I have sun shade cloth buffering them just a bit, but a big sheet of plastic would have been better.

I’m adding another growbed to my outside tank.  I like the new setup so well I’m going to max out the grow potential of the fish tank.  I have to inventory my bulkhead fittings.  I need two uniseals the same size for connecting another 5 gallon tank to the existing 5 gallon dump tank.  Adding another tank and bed will change the dump time from ~15 minutes to ~30 minutes.

I threw about a dozen lettuce seeds into the plant wall gutter.  By they time they’re ready to transplant out I should have the new growbed up and running . . . and warmer weather. <fingers crossed>

Growbed update

This is the cobbled together frame. Three legs are pressure treated, one is cedar.
Frame set into the ground (~4" holes) with mortar tray in place
Flush tank in place, flush drain in place
Tank side of the bed showing loop siphon and fill tubing

The drain as the flood tank flushes

Wadly and I got all the bits put together and I’ve taken pics to share.

This system is designed to be built out of 55 gallon barrels (see the barrelponics group on yahoo) but I’m having a hard time finding clean free barrels in my area.  Instead, I opted for the $4.96 option . . . a mortar mixing tray from Home Depot.  The gas to go to where I can get 55 gallon drums is more than the cost of the tray.  Add to that the cost of purchasing barrels (current best price is $15 ea.) and I’m way ahead.

Wadly built the frame to support the mortar tray.  I think it’s clever.  All the wood is recycled bits and pieces assembled with torx screws.

I had originally planned for additional posts to hold up the dump tank until I got a clue <shaking head at self> and had Wadly cut me some 2×6 angled pieces to hold a 2×8 shelf.  I drilled a notch on one side of the shelf to accept the bottom of the toilet fill kit installed in the dump bucket.

The 5 gallon dump bucket is recycled and the  drain plumbing parts cost about $10.  I didn’t have any of the adapters and connectors for 1½” pipe though I did have some 2″ and a 2″ elbow all glued together which I used.  Everything is dry fitted so it can be disassembled and adjusted or cleaned.

All along the length of the drain pipe are skill saw cuts ¾” apart.  They are cut across the length of the pipe and go through 1/3 the thickness.  The next time I take it apart I’ll get pictures.  The end cap had six holes drilled in it.

When I build the next bed I will run one drain down the center and see how that works.  Or maybe use 1″ pipe instead of 1½”.

I have three tomato plans (SunGold, Beefsteak and yellow cherry) and 4 green pepper.  I will add red pepper as well when I can get some plants.

Wadly has cut a cover for the tank but the edges need routered and it needs waxed to keep the rain from soaking in.  It’s in the shop waiting for me to get out there and do the task.

New growbed

Wadly and I got the new growbed up and running.  I am using the same Rubbermaid 100 gallon stock tank for the fish and bought a new (spent a whole $4.96) mortar mixing tray for the growbed.  It’s about 20″ x 30″ and about 7″ deep.  It doubles the grow area from the old bed.

I’ve got the dump tank (recycled 5 gallon bucket) set up and working, though a little more fine tuning will no doubt be required.  I’ve got to address the water into bed distribution line as the dump does two things that it shouldn’t, it spills water over the side of the bed from the rush of water and it digs a big hole in the gravel.  I need to moderate that and will pick up the parts today to make that happen.  Wadly and I jury-rigged what we’ve got.  It works but badly and I can’t fix it without a few more parts.

I also need to get a petcock valve for the tank side of the tee to regulate the flow to the dump tank.  For now I’ve bent the tubing and have a knee-high nylon (my favorite filter medium) around it to pinch the flow a bit.  That will work in the short term but in the long term I’d like to have a little finer control.

Wadly’s going to build a cover for the tank to keep the sun out and the algae growth (causes a big PH rise) down.   I had the tank covered with a piece of white tarp last year, but he’d like something with better eye appeal.

If you’re interested in a growbed of your own, visit the barrelponics yahoo group for like minded folk.

Orchid update

The center leaf has doubled in size since the orchid was installed in the wall

The bud on the stalk is developing.

I’ve been keeping a close eye on the orchid to see what it would do.  It’s crammed in in the midst of a lot of other stuff and only gets filtered light.  It seems to be quite happy, showing new leaf growth and new bud development on the flower stalk.

Aphid Chaser

Wadly brought home Aphid Chaser yesterday.  I pinned two on the wall with stainless steel pins.  Aphid Chasers appear to be red foam, about the size of a half sucked away Life-Saver candy.

I moved the Aphid and White Fly trap to the far side of the sliding glass door, away from the plant wall.  When I get all the aphids out of the wall I’ll move one of the chasers to the garden window.  I don’t have any aphids there and I sure don’t want any.

Milestones

Chuckster, no longer a special case, now he's "just a dog"

I took all the dogs to town with me a couple weeks ago and Chuck went into Home Depot with me.  Riding in the basket of my cart, he let strangers pet him without flinching or backing away.  That’s such a huge milestone.  When he came to us he was so traumatized I had to chase him down to touch him.  It was months before Terry could touch him.  Now anyone can.  Chuck’s deepest injury has finally healed.  This is huge.

Aquarium safe aphid solution

Well, I think I have the answer.  I just need to see if I can find this product locally.  This looks like the whole answer.

Aphid Chaser

Aphid Chaser uses pheromones to “upsets the insect’s chemical ecology and breaks down communications in aphid colonies.  These nontoxic dispensers do not affect beneficial insects <snip>. They act to ward off most common aphid types

I picked up a package of aphid and white fly traps.  I will hang one of the Aphid Chasers on the wall and one of the aphid and white fly traps away from the wall and eliminate the problem without spraying.  I see this as being an elegant and ideal solution.

Aphid control

I’m still researching how to permanently rid my wall of aphids while doing no damage to the attached aquarium.  I pick them off morning and night.  Sometimes I don’t find any or just one, other times I’ll find five or six.  I’m obviously not clearing them out so will have to find a way to eradicate them permanently.

I ran into this prep in my search.

Several years ago I came across a homemade remedy for aphids that is the best I have found. The recipe is quite simple and safe.

Put a pinch of Chewing Tobacco in a pint of warm water and let set overnight. Do not cover.

Mix 2 Tablespoons tobacco juice and 1 Tablespoon Listerine in 32 ounce spray bottle and fill with water. Add 2 drops of dish washing soap. Be sure and add soap last.

Spray on any of your pond plants as needed. This has never hurt any of my fish or plants.

This was posted on http://www.macarthurwatergardens.com/PondQ&A-Archives/Safe-NaturalCureFor-Aphids.html by “Sharon from Oklahoma”.

I don’t have chewing tobacco or Listerine, but it sounds like an interesting prep.