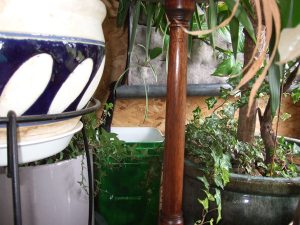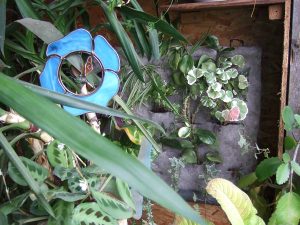
I have my vertical garden up and running. I’m not thrilled with the plants I have in it, but this is an experiment and I need to know what will and won’t work. I’ll do it differently next time, leaving the wall laid on the table until I get everything planted, assuming the wall is as small as this. That will make organizing and stapling easier. I may even map my layout on the felt using a Sharpie. Yeah . . . that’s what I’ll do.
Here’s the parts list:
- Something to use as backer board. Mine is a scrap piece of 3/4″ utility grade plywood. It was already longer on one side than the other so no cutting was necessary. Serendipitous. You probably won’t be that lucky, so you’ll need about a 1/2″ difference between the length of the two sides to ensure enough slant for proper drainage. Make sure whatever you use, it is something that can be left out in the rain. You’re not going to leave it out in the rain, but you are going to staple a rain forest to it.
- 2″ diameter poly pipe 3 1/2″ longer than the backer board is wide. This will be slotted to fit over the bottom of the vertical wall. The length is important. You don’t want the end of the slot tight against the side of the board or you’ll be providing a path for water to flow outside the pipe. You also need enough room for the tubing to be tucked into the poly pipe and out the end into the drain bucket.
- Flooring felt (laid under carpet for stairs and heavy traffic areas) 1″ wider and 2″ taller than the backer plywood. Mine is a left over from when we carpeted my office. I can make three more walls this size with what I’ve got left over.
- Pond pump. I’m using a Pondmaster 160. Whichever pump you choose, it has to have at least a 6′ head. Don’t buy more pump than you need because you’ll have to throttle it back anyway. I have a Laguna Statuary 2 pump around somewhere that I was going to use, but can I find it? Not even close. I finally gave up and bought another pump.
- Programmable timer that allows for programming in 15 min increments (I bought mine on eBay, $1+$7.50 shipping).
- 6′ of tubing to fit your pump (black so you don’t get algae buildup in the tubing) and a barbed elbow (for the corner at the top of the wall). I’m using 3/8″ ID tubing.
- 9/16″ staples and staple gun. A staple hammer won’t work here. Precise application of staples is required.
- Pliers, 16 penny nail and a candle for putting water outlet holes in the tubing.
- 6 sheetrock screws
- Drill sized to match sheetrock screws
- Screw driver to match sheetrock screws
- Skill or saber saw for cutting poly pipe
- Something to plug the tubing. I used a short piece of doweling tapered to fit. There’s not a lot of pressure here, so it doesn’t need to be fancy.
- Something to use for standoffs so the vertical garden is held away from the wall. Furniture feet would work. I used 2″ hex head screws screwed in 1/2″ because I have it hung on an OSB wall. If you’re hanging it on something you don’t want to mar, plan accordingly.
- Something with which to hang the plant wall. I screwed on ell hinges and put hanger wire through the holes and hung the whole affair on more hex head screws. My wall only weighs about 15 pounds now, but I’m planning on it weighing more as the plants grow. If you have to be careful of the wall, plan accordingly.

Construction:
- Prepare the poly to act as water catcher by cutting 1/4 of the pipe away leaving 1″ intact at each end. This slot is what the bottom of the wall and felt will fit into for water catchment. If you have a hole saw, use that to create the ends of the slot, then use a saber or skill saw to connect the holes creating the slot. Plug one end. I used a tin can lid glued on using aquarium silicone. Ugly, but cheap and it works. Spray it black to match the pipe if it bothers you or spend the $ for a black PVC cap.
- Wax or oil the plywood HEAVILY on the side you will be stapling the felt to. I ironed a wax and oil combo into the wood until it wouldn’t take any more. I also ironed it into the edges. I don’t know if the plywood will hold up. It’s utility grade, so it might. If not I’ll pull the staples and replace the wood with something else. If you have something you think will work better, give it a try and let me know how it goes.
- Place the felt over the plywood and staple it on, running a row of staples around the edges at 3″ apart. Do NOT wrap the felt to the back. (You’ll need to figure out how you’re going to mount the length of tubing that goes across the top and feeds water down into the felt. If I were to do this again I would do it differently. What I did works really well, though. I ran the tubing in below the top row of staples then ran another row of staples below the tubing to hold it tight up against the top of the wall. If you look closely at the picture above you’ll see the hump the tubing makes under the felt.)
- Trim the felt leaving a bit of an overhang at the sides and a bit more of an overhang at the bottom.
- Place the wall felt side down with the bottom side extending off the edge of the table. Slide the poly pipe onto the bottom edge and mark the screw hole locations on the poly pipe. These will need to be drilled at an angle so the screws can go straight into the wood. Make sure the plugged end is at the shorter end of the wall.
- Screw the poly pipe to the bottom of the wall. I don’t know if it matters if the felt is touching the bottom of the poly pipe. Use your best judgment. The idea is to have the poly pipe hang with the slot level front to back and slanted toward the drain end. Screw accordingly.
- Cut a piece of the 3/8″ tubing 1″ longer than the top of the garden wall.
- Using the pliers to hold the 16d nail, heat the nail over the candle flame then pierce one side of the tubing. The holes should be spaced about 1″ apart and it’s best if the holes are in a relatively straight line.
- Lightly lubricate (I used olive oil) the ends of the tubing. Insert the plug in one end and the elbow in the other. Be mindful of where the row of holes is in relation to the elbow. You want the water to come out of the tubing and go into the felt. Don’t point the holes straight down. When looking at the end, the holes should be at 5 o’clock, pointing down and toward the front for going into the felt.
- Connect the supply tubing to the elbow. Olive oil will help the barbed fitting slide fully into the tubing.
- Run the tubing between the felt and the backer board and fasten it in place.
- Run the pump end of the tubing down the side of the plant wall and into the slot in the poly pipe, then out the drain end of the pipe. This will help hold the supply tubing in place. I added no additional fastenings at this point. If I were building a larger wall, I might have to, but for how this works fine.
- Connect the pump.
- Now’s the perfect time to hang your wall and test it. Put the pump in a bucket of water and plug it in!
- I use a large rotary cutter for cutting the planting slits, but a box knife will work.
- Put enough staples in around the plant to secure it, but don’t get carried away. too many staples = not enough root room, so use discretion and common sense.
The felt stays surprisingly dry. I have my timer set so the pump runs for 15 minutes, then is off for 90 minutes. We’ll see how it grows. I don’t hold huge expectations for the plants I’ve used filling in the wall completely, but this will act as a good test. As with everything, YMMV.
Notes:
- I tied one end of a piece of cloth on the end of the drain pipe and dropped the other end in the bucket to act as a pathway for the water and to reduce splash and noise.
- I bought 7′ of tubing thinking I would put the wall up higher, but to get the best light, given the number of plants I already have in that corner, I dropped the wall down to just above the bucket. I didn’t cut off the extra tubing, just left it curled in the bucket. This allows me to install the wall up higher in future without buying new tubing.
- I put the spider plant babies into the wall without any soil. There’s one at the bottom left, but a whole row at the top. We’ll see how they do.
- I shook as much soil off the roots as I could before sticking the plants in their respective slots.
- For plants with long loose roots I wrapped stiff paper in a tube around the rootball and pushed the tube into the slot, then held the plant in place while extracting the paper.
- When the felt was dry water would follow the downwardly facing leaves of the spider plant and drip on the floor. I put a temporary block behind the bottom of the wall to tip it out further so the drain pipe at the bottom would catch the drips. As soon as the felt got damp this condition went away and the block was removed.

How much did this cost you all together?
Really, just the cost of the pump and the felt. I had everything else here . . . plant cuttings, scrap plywood, staples, pvc pipe for the gutter, screws.
Hello!
I would like you to ask for your help in connection with plant wall materials.
I’d like to make my own wall, but I need the felt, but in my country I haven’t got this carpet padding felt. We use an other material for this purpose. So if you could tell me something abotu this felt, please help.
If you give me a link, to the shop, where you bought it, maybe I can find something similar.
The store I purchased at is no longer in business. I know this product is available online. If you do an online search for felt carpet pad you should find suppliers. I did. This is the first search item that sold carpet pad (http://www.buildingforhealth.com/proddetail.php?prod=CP_FLT) but I know it’s not the only one.
Thanks for help! It’ll be solve my problem!